Manual
Contents
- 1 System requirements
- 2 Prerequisites
- 3 Installation
- 4 Quickstart
- 5 Render settings
- 6 Advanced render settings
System requirements
To use Bakery you'll need:
- Windows (7 or higher) PC.
- Nvidia GPU. Minimum supported model is Kepler (GeForce 6xx or newer. For Quadro cards check the specs).
- 64-bit Unity editor. Bakery was tested on all versions from 5.6 to 2019.1.
Prerequisites
- Make sure your project does not have any script compilation errors, as it will prevent Bakery scripts from compiling as well.
- Make sure you have the latest GPU driver. Update it if needed.
Installation
1. Import Bakery to your project via Asset Store.
2. Unity will show a list of files to import. If it's your first time using Bakery, it is recommended you just click Import. Experienced users may want to untick the examples folder for a more lightweight installation.
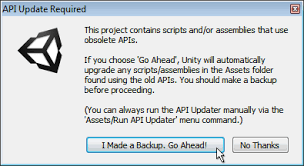
3. Unity will then import Bakery and compile the scripts. It may show a window like this:
In which case you should click "Go Ahead".
You should now see Bakery menu added to the editor:
Quickstart
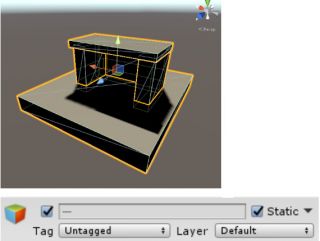
1. Add some model or primitive and mark it as Static.
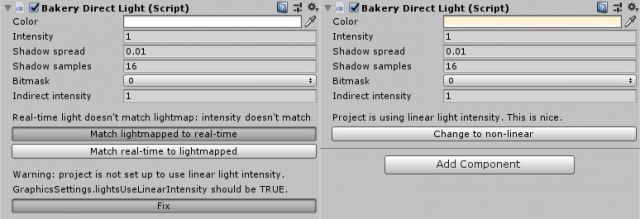
2. Select Directional Light (the one Unity created for you) and add Bakery Direct Light component to it.
3. Bakery Direct Light has many options to tweak, but you can easily match it to Unity light. Click Match lightmapped to real-time. Now Bakery light should have the same yellowish color as Unity’s default Directional.
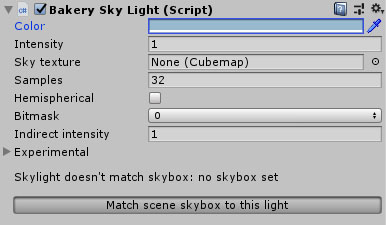
4. To get shadowed ambient lighting, create Skylight (Bakery->Create->Skylight).
5. Select Skylight, give it some bluish color and click Match scene skybox to this light. This will make scene skybox match lighting exactly.
6. Click Bakery->Render Lightmap. By default, Full Lighting mode is active. It will bake both direct and indirect contribution from all lights. If you want to combine real-time shadows with baked GI, change it to Indirect.
7. Click Render.
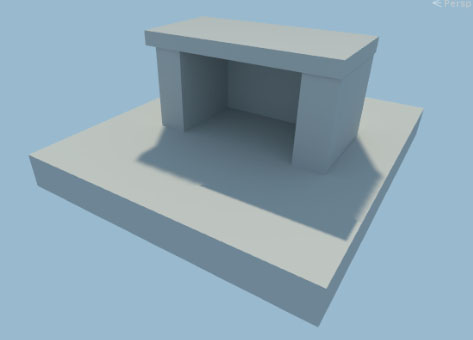
8. Done! You should now have baked GI:
Render settings
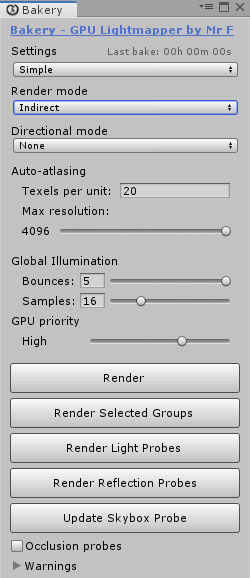
All render settings can be accessed via Bakery->Render Lightmap. Settings are saved for every scene. The topmost option in Bakery window allows you to switch between Simple, Advanced and Experimental settings, each succeeding mode revealing more tweakable options. Simple mode is enough for most scenes and it's a good way to get started.
Render mode
Defines the type of lightmaps to bake.
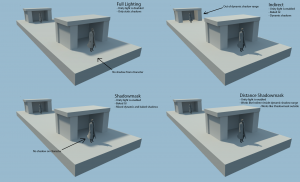
Full Lighting
Complete direct and indirect lighting for all Bakery lights.
Indirect
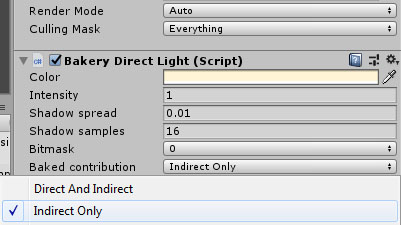
Basic mixed mode. It will look at the Baked Contribution selector on every light: if it’s set to Direct And Indirect, the light is baked as in Full Lighting mode. If it’s set to Indirect Only, only indirect contribution (GI) from this light is baked. In latter case you should keep both Unity and Bakery lights on the object, one giving real-time direct contribution, and another for precomputed GI.
Shadowmask
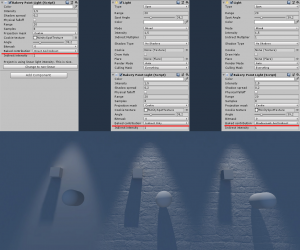
A more advanced mixed mode. It works by generating two types of lightmaps - one with baked color (as in Indirect mode), and another with shadows from static objects. It has several benefits:
- Real-time shadows can render only a handful of dynamic objects, instead of the whole scene.
- Real-time and baked shadows blend together properly.
- Real-time lights can render bump, specular and other surface effects, while still being occluded by high-quality baked shadows.
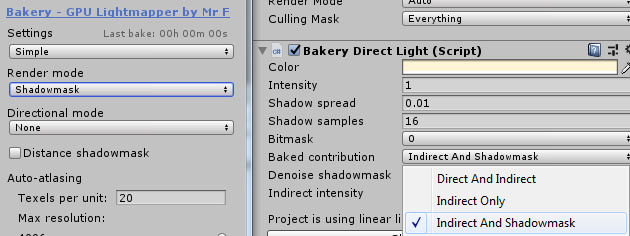
Currently only Direct, Point and Spot lights can interact with shadowmasking (because they are the only types Unity supports in real-time). To enable this behaviour, you must have both Unity and Bakery lights on the same object, with Baked Contribution set to Indirect and Shadowmask. Unmarked lights will be baked as in Indirect mode.
Distance Shadowmask
This checkbox is only visible if you chose shadowmask and simply toggles equally named setting in project’s Quality Settings. More details.
Directional mode
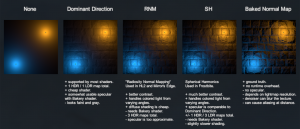
Defines how directional information is baked. Standard lightmaps only store a single color per texel, while directional lightmaps give shaders a hint of how lighting changes over a hemisphere around the texel. This data is required to combine fully lightmapped areas with normal maps. Plugging it into the built-in Bakery shader can also produce approximate specular response.
None
No directional data, single color per texel.
Baked Normal Maps
Still no directional data, but normal maps are taken into account when rendering the lightmap. There is no additional runtime overhead. Since lightmaps usually have lower resolution than normal maps, the result may look blurry. Other problems include aliasing at distance due to lack of mipmapping and denoising step potentially smudging the detail. To learn how to use custom shaders with procedural normals in this mode, read Shader Compatibility section.
Dominant Direction
This mode is similar to what Enlighten and Progressive bake in Unity. It is compatible will most shaders, only generates one additional map and the runtime overhead is minimal. The downside is that bump-mapping looks rather faint and gray-ish and can be quite different comparing to the same object under real-time lighting.
RNM
Based on Radiosity Normal Mapping technique originally invented for HL2 (slides) and later used in many games (e.g. Mirror’s Edge). It generates 3 HDR maps in total, being the most memory-demanding mode of all. Runtime overhead is still relatively low. This mode is more precise than Dominant Direction. It is better at reproducing surface contrast and handling colored lights affecting normal maps from different angles.
SH
Based on “Precomputed Global Illumination in Frostbite” paper. This is the highest quality mode, giving much better surface contrast and representing differently colored lighting coming from different directions. Generates 4 maps in total, only one of them being HDR, therefore takes less memory than RNM. Runtime overhead is slightly higher than that of RNM.
Limitations
- RNM and SH can be only used with Bakery shader or require adjustments to your shaders.
- In RNM and SH modes, standard color lightmaps are not created. You need to either have Bakery shader on all materials in the scene, or use Lightmap Groups to separate RNM/SH objects from the rest.
- RNM and SH maps are applied to objects using MaterialPropertyBlock and so may be not shown completely in Unity’s Lighting window.
- Dominant Direction, RNM and SH modes may require slightly more samples for GI and Light Meshes to get comparable quality.
Texels per unit
Approximate amount of lightmap texels per world unit. Affects the amount and resolution of generated lightmaps.
Example values to get you started:
- Large outdoor area (a city): 1 - 5
- Medium outdoor area (a few alleys): 10-20
- High quality interior: 100
Keep in mind that Texels Per Unit is base resolution, but every object can be additionally tweaked using Scale in Lightmap option on Mesh Renderers as well as “Scale per map type” in Bakery window.
Max resolution
Maximum lightmap size limit. If objects can't fit in a single lightmap (given current Texels Per Unit value), additional lightmaps will be allocated. Same 4 square objects can take four 512x512 maps or one 1024x1024.
Bounces
Defines how many times light rays should bounce off surfaces. Usually lower values are sufficient for outdoor scenes (e.g. a city), while higher values are required for more closed scenes (interiors, caves).
Samples
Affects quality of GI. Typical values are from 16 to 32.
GPU Priority
While GPU is working on lightmaps, OS and other software may become less responsive. This option allows you to balance between baking speed and system responsiveness.
Render
Bakes lightmaps for all opened scenes.
Render Light Probes
Bakes light probes for all opened scenes.
Render Reflection Probes
Bakes reflection probes for all opened scenes. This button is just for convenience and will call built-in engine reflection probe update.
Update Skybox Probe
Bakes global diffuse and reflection probe for the current skybox. As with "Render Reflection Probes", it just calls built-in engine functions.
Occlusion probes
When "Render Light Probes" is pressed, lets Unity bake occlusion probes using currently selected built-in lightmapper. Occlusion probes is additional data stored inside regular light probes, and it prevents dynamic objects from getting lit in shadowed areas. Currently there is no way to use custom occlusion probes in Unity, and it has to call its own lightmappers instead to do the job.
Warnings
These options will validate the scene after one of the Render buttons is pressed and show warning dialog boxes asking to continue or stop the baking process.
- UV validation: will check if all models have fully correct lightmapping UVs - specifically if they lie within 0-1 range and don’t overlap.
- Overwrite check: will tell which lightmap files are going to be overwritten.
- Memory check: will tell a very approximate amount of video memory required.
- Sample count check: will check if any lights, GI or AO have unreasonable sample counts that can make GPU go out of available resources.
- Lightmapped prefab validation: validates Lightmapped Prefabs and notifies if some prefabs are going to be overwritten.
Advanced render settings
Adjust UV padding
If enabled, will look for models with auto-generated UVs (“Generate Lightmap UVs” on the asset) and adjust them further to have proper padding between UV islands per-mesh. Model-wide Pack Margin in importer settings is ignored. Optimal values are calculated instead, given area of each mesh and lightmap resolution.
Unload scenes before render
Unloads Unity scenes before baking to free up video memory. Complex scenes can take a few gigabytes of VRAM by simply being shown in editor.
Denoise
If enabled, will apply denoising algorithm. Bakery uses Nvidia’s AI denoiser.
Fix Seams
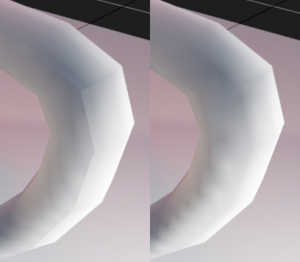
If enabled, will attempt to blend seams created by UV discontinuities. Useful for smooth geometry, including Unity’s default sphere.
