Difference between revisions of "Troubleshooting"
(→Bakery doesn't work on my 3070/3080/3090 GPU) |
(→Error message "Failed to load OptiX library") |
||
| (75 intermediate revisions by the same user not shown) | |||
| Line 17: | Line 17: | ||
* If you're on 5.6, go to Window->Lighting->Mixed Lighting->Lighting Mode to switch the mode. | * If you're on 5.6, go to Window->Lighting->Mixed Lighting->Lighting Mode to switch the mode. | ||
<hr> | <hr> | ||
| + | |||
| + | === I can't see specular lighting after the bake === | ||
| + | Apparently specular lighting was provided by real-time lights before the bake. Now the lighting is baked into static textures and there is no specular. However, you can: | ||
| + | * Use Reflection Probes. Good option for highly glossy objects. | ||
| + | * Use mixed lights and only bake GI/[[Manual#Shadowmask|Shadowmasks]]. Specular remains real-time. | ||
| + | * Bake in [[Manual#Dominant_Direction|Dominant Direction]] or [[Manual#SH|SH]] mode and use [[Manual#Bakery_shaders|Bakery shaders]] with "Lightmapped specular" option. It will give some specular approximation. Looks good on surfaces with medium/high roughness. | ||
| + | |||
| + | <hr> | ||
| + | |||
=== Using a version control system I copied the scene to another PC and it doesn't look right === | === Using a version control system I copied the scene to another PC and it doesn't look right === | ||
Make sure you followed [[How_do_I...#How_do_I_use_git.2Fcollab.2Fother_version_control_system_with_Bakery.3F|version control guidelines]]. | Make sure you followed [[How_do_I...#How_do_I_use_git.2Fcollab.2Fother_version_control_system_with_Bakery.3F|version control guidelines]]. | ||
<hr> | <hr> | ||
=== Baking same asset in one scene breaks its UVs in another scene === | === Baking same asset in one scene breaks its UVs in another scene === | ||
| − | The reason here is [[Manual# | + | The reason here is [[Manual#Asset_UV_Processing|UV padding adjustment]]. It modifies the UVs in the asset, so spacing between UV charts is optimal, meaning they never leak over each other and there is no much wasted space. Unity has a manual Pack Margin option on model assets, but it’s limited since it applies the same exact value for all meshes inside the model, while each mesh can get drastically different size in the final lightmap based on its surface area. Therefore Bakery overrides it with automatically calculated per-mesh (instead of per-model) padding. However, because “optimal” varies depending on baking resolution, it can be problematic to reuse the same asset in isolated scenes with different lightmap size. There are multiple ways to solve it: |
| − | * Generate your own optimal UVs. UV padding adjustment only applies to models with auto-generated UV layout (aka “Generate Lightmap UVs” checkbox) and never touches custom data. | + | * a) Just disable UV padding adjustment (set to [[Manual#Asset_UV_Processing|Don't Change]]). Results will be similar to built-in baking. |
| − | * Use [[Manual#UV_padding:_increase_only|UV padding: increase only]] checkbox and first bake the lowest resolution scene, and then the rest. | + | * b) Generate your own optimal UVs. UV padding adjustment only applies to models with auto-generated UV layout (aka “Generate Lightmap UVs” checkbox) and never touches custom data. |
| − | * | + | * c) Set Asset UV Processing to "Adjust UV padding only for new meshes" (currently available in the [[Github_access|github]] version). |
| − | + | * d) Use [[Manual#UV_padding:_increase_only|UV padding: increase only]] checkbox and first bake the lowest resolution scene, and then the rest. | |
| − | * Bake both scenes together. | + | * e) Use two different models for different lightmap resolutions, so each will get the most efficient set of UVs. |
| − | * Lock UVs using [[How_do_I...#Alternative_solution|Save UV padding to asset]] | + | * f) Bake both scenes together. |
| + | * g) Lock UVs using [[How_do_I...#Alternative_solution|Save UV padding to asset]] | ||
<hr> | <hr> | ||
| Line 58: | Line 68: | ||
This error can also be shown in case of GPU driver crash, in which case Unity editor also won't render anything. | This error can also be shown in case of GPU driver crash, in which case Unity editor also won't render anything. | ||
| + | |||
| + | If this error happens at the end of the render process (from the seamfixer app), try increasing the [[Troubleshooting#I_get_a_.22Launch_timeout.22_error|TDR]]. | ||
| + | |||
| + | <hr> | ||
| + | |||
| + | === I get a “Can't create texture” or "Can't create rasterizer state" error === | ||
| + | Typically errors like this are caused by such chain of events: | ||
| + | * Some objects in the scene have incorrect lightmapping UVs. Often the UVs contain many large triangles overlapping each other. | ||
| + | * Scene uses large lightmaps. | ||
| + | * Bakery tries to rasterize a huge amount of 4k-sized overlapping triangles to prepare the UV GBuffer. | ||
| + | * This operation takes > 2 seconds, and the driver is reset by Windows due to TDR: https://docs.microsoft.com/en-us/windows-hardware/drivers/display/timeout-detection-and-recovery | ||
| + | * Consequent GPU operations are failed due to reset. | ||
| + | |||
| + | Solution: | ||
| + | * Make sure all your objects either have non-overlapping UV2 or enable "Generate lightmapping UVs" on all model assets. | ||
| + | |||
<hr> | <hr> | ||
| Line 81: | Line 107: | ||
=== I get a "Launch timeout" error === | === I get a "Launch timeout" error === | ||
This error can happen if your GPU took more time than it is allowed by [https://docs.microsoft.com/en-us/windows-hardware/drivers/display/timeout-detection-and-recovery Windows TDR]. | This error can happen if your GPU took more time than it is allowed by [https://docs.microsoft.com/en-us/windows-hardware/drivers/display/timeout-detection-and-recovery Windows TDR]. | ||
| + | * Try disabling [[Manual#Terrain_optimization|Terrain Optimization]]. | ||
* Try lowering the value of [[Manual#Tile_size|Tile Size]], especially if it's higher than 512, so baking job is split into smaller chunks. | * Try lowering the value of [[Manual#Tile_size|Tile Size]], especially if it's higher than 512, so baking job is split into smaller chunks. | ||
* Depending on the pass being processed, try lowering the Samples value (e.g. [[Manual#Samples|GI samples]], [[Manual#Bakery_Sky_Light|Skylight samples]], etc). | * Depending on the pass being processed, try lowering the Samples value (e.g. [[Manual#Samples|GI samples]], [[Manual#Bakery_Sky_Light|Skylight samples]], etc). | ||
* Reduce geometric complexity of the scene, if tile size/samples don't help. | * Reduce geometric complexity of the scene, if tile size/samples don't help. | ||
| − | |||
* As a last resort, [https://docs.microsoft.com/en-us/windows-hardware/drivers/display/tdr-registry-keys disable TDR registry keys]. This will prevent Windows from resetting the driver, but your computer may appear unresponsive during the bake. | * As a last resort, [https://docs.microsoft.com/en-us/windows-hardware/drivers/display/tdr-registry-keys disable TDR registry keys]. This will prevent Windows from resetting the driver, but your computer may appear unresponsive during the bake. | ||
| + | |||
| + | [https://substance3d.adobe.com/documentation/spdoc/gpu-drivers-crash-with-long-computations-tdr-crash-128745489.html Additional instructions for changing the timeout (from Substance)] | ||
<hr> | <hr> | ||
| Line 91: | Line 119: | ||
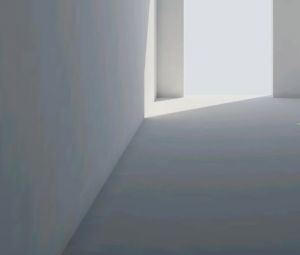
=== I have an Android project, and lightmaps don't look good === | === I have an Android project, and lightmaps don't look good === | ||
[[File:Banding.jpg|Android banding artifacts|thumb]] | [[File:Banding.jpg|Android banding artifacts|thumb]] | ||
| − | [[File: | + | [[File:LightmapsTechnicalDetails.png|Lightmap encoding in player settings|thumb]] |
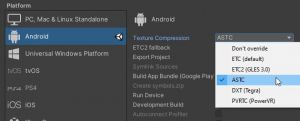
| + | [[File:Astc.jpg|Build texture compression settings|thumb]] | ||
Sometimes, when working on Android projects, you may encounter banding artifacts, with gradients having discrete steps of different hue. | Sometimes, when working on Android projects, you may encounter banding artifacts, with gradients having discrete steps of different hue. | ||
This is caused by texture compression and HDR encoding Unity uses for this platform, which often turns out to be "Double LDR" ([https://docs.unity3d.com/Manual/Lightmaps-TechnicalInformation.html see details]). The problem is not exclusive to Bakery and will as well happen with built-in lightmaps. | This is caused by texture compression and HDR encoding Unity uses for this platform, which often turns out to be "Double LDR" ([https://docs.unity3d.com/Manual/Lightmaps-TechnicalInformation.html see details]). The problem is not exclusive to Bakery and will as well happen with built-in lightmaps. | ||
| − | + | In Player Settings, set Lightmap Encoding to '''High Quality'''. | |
| + | |||
| + | If your target devices support ASTC compression, make sure it is enabled in Build settings. PVRTC is also a good choice, although it is mostly supported on iOS devices. ETC compression gives poor results for lightmaps. | ||
| + | |||
| + | If above solutions are not enough, select lightmap assets and set texture compression quality to '''High''' or '''None''' (try both). | ||
Note that setting it to None will use more video memory on the device. | Note that setting it to None will use more video memory on the device. | ||
| + | |||
| + | <hr> | ||
| + | |||
| + | === I have a scene baked with MonoSH, and lighting looks pixelated === | ||
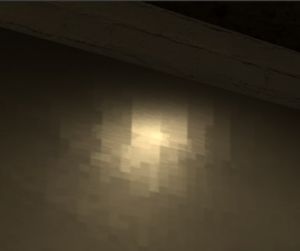
| + | [[File:Normalq.jpg|MonoSH compressed with low quality encoding|thumb]] | ||
| + | In some scenes, [[Manual#MonoSH|MonoSH]] lightmaps can look pixelated, if low (or "normal") quality compression is used (e.g. DXT1). Usually setting Compression = High on the L1 texture fixes the issue. | ||
| + | |||
| + | You can enable all L1 textures to always use High quality compression by toggling Project Settings -> Bakery -> '''High quality direction'''. | ||
| + | |||
| + | Note that depending on the platform, High quality compression can take more memory. On PC it usually doubles by going from DXT1 to BC7 format. | ||
| + | |||
| + | <hr> | ||
| + | |||
| + | === There are weird square artifacts on my geometry === | ||
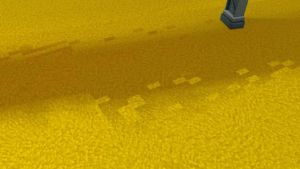
| + | [[File:Smoothnormals flatshape.jpg|Square artifacts from incorrect normals|thumb]] | ||
| + | Weird squares may sometimes be seen on models when their shape is too different from their normals. Bakery [https://ndotl.wordpress.com/#shadowterm tries to compensate] starting ray points to take fake normal smoothness into account, but in extreme cases the algorithm can't handle the discrepancy. | ||
| + | Usually it's enough to just recalculate normals on the model. E.g. in Unity you can select the FBX and change "Normals" to "Calculate" instead of "Import". | ||
| + | Alternatively, you can disable the related compensation algorithm, but it’s actually beneficial in most cases. You can toggle it in Project Settings → Bakery → Generate smooth positions. | ||
<hr> | <hr> | ||
| Line 103: | Line 154: | ||
=== I get too many lightmaps === | === I get too many lightmaps === | ||
Possible causes are: | Possible causes are: | ||
| − | * ''Texels Per Unit'' value is high or ''Max Resolution'' is low. Bakery packs objects from open scenes into multiple lightmap atlases and packs them as rectangles (in a fashion similar to [https://blackpawn.com/texts/lightmaps/default.html this]) with their size dependent on (surface area * texels per unit). If some object can't fit into existing atlases, a new one is allocated. New atlases are always as large as the Max Resolution parameter, or smaller (but not smaller than ''Min Resolution''), if the estimated surface area of remaining unpacked objects is below some threshold. You can also increase Min Resolution a bit, replacing a bunch of small (but dense) maps with a few large (but possibly with some empty space). | + | |
| + | * [[Manual#Atlas_Packer|Atlas packer]] is set to ''Default'' or ''Post-packing'' is disabled. Set Atlas Packer to ''xatlas'' and enable Post-packing for best results. | ||
| + | |||
| + | * ''Texels Per Unit'' value is high or ''Max Resolution'' is low. Bakery packs objects from open scenes into multiple lightmap atlases and packs them as rectangles (in a fashion similar to [https://blackpawn.com/texts/lightmaps/default.html this]; unless Hole Filling is enabled) with their size dependent on (surface area * texels per unit). If some object can't fit into existing atlases, a new one is allocated. New atlases are always as large as the Max Resolution parameter, or smaller (but not smaller than ''Min Resolution''), if the estimated surface area of remaining unpacked objects is below some threshold. You can also increase Min Resolution a bit, replacing a bunch of small (but dense) maps with a few large (but possibly with some empty space). | ||
| + | |||
| + | Additionally, increase ''Min Resolution'' to prefer larger combined lightmaps instead of many smaller ones. | ||
| + | |||
| + | If not using post-packing: | ||
| + | |||
* If you bake multiple open scenes and ''Split by scene'' checkbox is on, different scenes will never share the same lightmap, therefore multiplying their count. | * If you bake multiple open scenes and ''Split by scene'' checkbox is on, different scenes will never share the same lightmap, therefore multiplying their count. | ||
* If ''Terrain optimization'' is on, terrains will always use a separate lightmap. | * If ''Terrain optimization'' is on, terrains will always use a separate lightmap. | ||
| Line 115: | Line 174: | ||
[[File:Softshadows.png|Jagged shadow mitigation|thumb]] | [[File:Softshadows.png|Jagged shadow mitigation|thumb]] | ||
Apparently you are baking very sharp shadows at low resolution. Try increasing shadow spread parameter on the light ([[Manual#Bakery_Direct_Light|direct]] or [[Manual#Bakery_Point_Light|point]]) and optionally enable [[Manual#Shader_Tweaks|bicubic interpolation]]. | Apparently you are baking very sharp shadows at low resolution. Try increasing shadow spread parameter on the light ([[Manual#Bakery_Direct_Light|direct]] or [[Manual#Bakery_Point_Light|point]]) and optionally enable [[Manual#Shader_Tweaks|bicubic interpolation]]. | ||
| + | On a [[Manual#Bakery_Direct_Light|Direct Light]] you can also enable the '''Anti-Alias''' option. | ||
<hr> | <hr> | ||
=== "Exporting scene - preparing" is taking too long === | === "Exporting scene - preparing" is taking too long === | ||
| + | (Or "Exporting scene - atlasing") | ||
* Try setting [[Manual#Atlas_Packer|Atlas Packer]] to Default. | * Try setting [[Manual#Atlas_Packer|Atlas Packer]] to Default. | ||
* Make sure you use reasonable [[Manual#Texels_per_unit|Texels Per Unit]] value. | * Make sure you use reasonable [[Manual#Texels_per_unit|Texels Per Unit]] value. | ||
* Make sure your meshes are [[Manual#Quickstart|correctly unwrapped]]. | * Make sure your meshes are [[Manual#Quickstart|correctly unwrapped]]. | ||
| + | * Possibly disable [[Manual#Asset_UV_Processing|UV Padding Adjustment]]. | ||
| + | |||
| + | If you're converting a large existing scene, make sure to follow [[How_do_I...#How_do_I_quickly_port_my_existing_scene_to_Bakery.3F|this guide]]. | ||
<hr> | <hr> | ||
| Line 133: | Line 197: | ||
Because Unity technically has no support for prefabs having lightmaps, it can omit lightmapped shader versions from builds, not realizing they are needed. You can fix it by going to [https://docs.unity3d.com/Manual/class-GraphicsSettings.html?_ga=2.212464724.1917527976.1586930444-1257434621.1522062178#stripping Shader stripping settings] and enabling lightmap modes you use. | Because Unity technically has no support for prefabs having lightmaps, it can omit lightmapped shader versions from builds, not realizing they are needed. You can fix it by going to [https://docs.unity3d.com/Manual/class-GraphicsSettings.html?_ga=2.212464724.1917527976.1586930444-1257434621.1522062178#stripping Shader stripping settings] and enabling lightmap modes you use. | ||
Additionally, try disabling '''Optimize Mesh Data''' in Player Settings, as Unity may omit UV from the build. | Additionally, try disabling '''Optimize Mesh Data''' in Player Settings, as Unity may omit UV from the build. | ||
| + | |||
| + | {{note|In Shader Stripping settings "Directional" mode only applies to standard Unity directional maps aka [[Manual#Dominant_Direction|Dominant Direction]]. When using Baked Normal Maps, RNM or SH, use "Non-directional" lightmap mode checkboxes.}} | ||
<hr> | <hr> | ||
| Line 138: | Line 204: | ||
=== Speedtrees look fine in the editor, but black in builds === | === Speedtrees look fine in the editor, but black in builds === | ||
Also related to shader stripping. See the [[Troubleshooting#Baked_prefabs_instantiated_at_runtime_in_a_build_have_no_lightmaps|prefab solution]]. | Also related to shader stripping. See the [[Troubleshooting#Baked_prefabs_instantiated_at_runtime_in_a_build_have_no_lightmaps|prefab solution]]. | ||
| + | |||
| + | <hr> | ||
| + | |||
| + | === Scene is black in build === | ||
| + | See advice above. Additionally, if the scene is loaded asynchronously, call ftLightmaps.RefreshFull() when it is fully loaded. | ||
<hr> | <hr> | ||
| Line 149: | Line 220: | ||
* Possibly downsample/blur the HDRI | * Possibly downsample/blur the HDRI | ||
| − | + | <hr> | |
| + | |||
| + | === Small emissive (or brightly lit) surfaces produce noise === | ||
| + | The issue is similar to the one above and may happen when using very small and very bright emissive surfaces, or small non-emissive surfaces lit by a very intense light. In case of emissive surfaces, you can replace them with [[Manual#Bakery_Light_Mesh|Light Meshes]] to prevent it. See [[Manual#Differences_between_Light_Mesh_and_emissive_materials|Differences between Light Mesh and emissive materials]]. Alternatively, try increasing [[Manual#Samples|GI sample count]]. | ||
<hr> | <hr> | ||
| Line 168: | Line 242: | ||
=== Denoiser produces bright edges around geometry/shadows === | === Denoiser produces bright edges around geometry/shadows === | ||
[[File:Bredges.jpg|thumb|Bright edges]] | [[File:Bredges.jpg|thumb|Bright edges]] | ||
| − | Sometimes you may encounter bright edges or spots at high contrast edges caused by the denoising neural net | + | Sometimes you may encounter bright edges or spots at high contrast edges caused by the denoising neural net, most notably OptiX 6 and 7. |
| − | * | + | * Use OptiX 5 or OpenImageDenoise if you can ([[Manual#Denoiser|denoiser]] option). |
* Try enabling [[Manual#Denoise:_fix_bright_edges|Denoise: Fix bright edges]]. | * Try enabling [[Manual#Denoise:_fix_bright_edges|Denoise: Fix bright edges]]. | ||
| − | |||
* Try setting texture compression to None on lightmap assets. | * Try setting texture compression to None on lightmap assets. | ||
* Try setting [[Manual#Backface_GI|Backface GI]] to 1, removing dark shadows inside objects. While these shadows are normally not visible, their edges may cause problems for both the denoiser and texture compression. | * Try setting [[Manual#Backface_GI|Backface GI]] to 1, removing dark shadows inside objects. While these shadows are normally not visible, their edges may cause problems for both the denoiser and texture compression. | ||
| − | + | ||
| − | |||
| − | |||
| − | |||
<hr> | <hr> | ||
| Line 200: | Line 270: | ||
=== Whole scene is very bright or black === | === Whole scene is very bright or black === | ||
| − | * Check if your light intensities are in a reasonable range (< 100). | + | * Check if your light intensities are in a reasonable range (< 100; or <= 100000 Lux in HDRP). |
* Check the same for indirect intensity on all lights. A multiplication of direct and intensity intensity must not go into thousands, otherwise GI algorithm may overflow. | * Check the same for indirect intensity on all lights. A multiplication of direct and intensity intensity must not go into thousands, otherwise GI algorithm may overflow. | ||
* Check if you don't use assets with High mesh compression. When set to High, Unity mesh compression will completely destroy lightmap UVs, only leaving 8 bits for them. This may produce many lightmapping errors including this one. | * Check if you don't use assets with High mesh compression. When set to High, Unity mesh compression will completely destroy lightmap UVs, only leaving 8 bits for them. This may produce many lightmapping errors including this one. | ||
| − | + | * Check if you have any .hdr overrides in the Preset Manager that change the way lightmaps are imported. | |
| − | |||
| − | |||
| − | |||
| − | |||
| − | |||
| − | |||
| − | |||
| − | |||
| − | |||
| − | |||
| − | |||
| − | |||
| − | |||
<hr> | <hr> | ||
| Line 230: | Line 287: | ||
=== Bakery doesn't work on my 3070/3080/3090 GPU? === | === Bakery doesn't work on my 3070/3080/3090 GPU? === | ||
1. Please enable [[Manual#RTX_Mode|RTX mode]]. | 1. Please enable [[Manual#RTX_Mode|RTX mode]]. | ||
| + | |||
2. If denoiser also fails, please update from [[Github_access|github]] and use OpenImageDenoise option (some instructions are [[Troubleshooting#Denoiser_produces_bright_edges_around_geometry.2Fshadows|here]]). | 2. If denoiser also fails, please update from [[Github_access|github]] and use OpenImageDenoise option (some instructions are [[Troubleshooting#Denoiser_produces_bright_edges_around_geometry.2Fshadows|here]]). | ||
Updated denoiser (both new OptiX version and OpenImageDenoise) as well as automatic hardware detection will be soon released on the Asset Store. | Updated denoiser (both new OptiX version and OpenImageDenoise) as well as automatic hardware detection will be soon released on the Asset Store. | ||
| + | |||
| + | <hr> | ||
| + | |||
| + | === Denoiser produces grid-like patterns === | ||
| + | [[File:Gridlike.jpg|thumb|Grid-like denoiser pattern]] | ||
| + | |||
| + | OptiX denoiser might produdce grid-like patterns when fed with very low-precision lightmaps. Low precision is usually caused by either extremely dark or extremely bright lighting. It is recommended to stay within reasonable intensity range (see a similar advice for [[Troubleshooting#Lightmaps_look_black_or_have_bad_quality_in_an_HDRP_scene|HDRP]] above). | ||
| + | |||
| + | * Alternatively use OpenImageDenoise, as it does not produce this pattern. | ||
| + | |||
| + | * This issue also does not affect OptiX 5.1 denoiser ("Legacy denoiser") as its training dataset is in its own DLL, but affects the non-legacy version (OptiX 6.0) and only on driver versions newer than 442.50, as the training datasets are in the driver ([https://forums.developer.nvidia.com/t/optix7-denoiser-different-results-with-different-version-of-drivers/117989/2 explanation from NVIDIA]). | ||
| + | |||
| + | <hr> | ||
| + | |||
| + | === I get "rtcRes == RTC_SUCCESS" error === | ||
| + | |||
| + | You are using a 3xxx+ GPU with RTX mode disabled. Enable [[Manual#RTX_Mode|RTX mode]]. | ||
| + | |||
| + | <hr> | ||
| + | |||
| + | === Baking any scene crashes with unknown error === | ||
| + | |||
| + | There were [https://twitter.com/HarryAlisavakis/status/1331630028665348096 some reports] that Avast antivirus can block Bakery from running, even though Bakery's executables don't trigger any antivirus (including Avast) when [https://twitter.com/guycalledfrank/status/1331640614077796354 scanned via VirusTotal]. Perhaps it just block any executables that were launched 'indirectly', i.e. from another application. In any case, if you have Avast, try adding your project folder to exception list. | ||
| + | |||
| + | <hr> | ||
| + | |||
| + | === Combined meshes (e.g. using Mesh Combine asset) bake incorrectly === | ||
| + | |||
| + | [[File:Meshcombine.jpg|thumb|Mesh Combine "Regenerate Lightmap UVs" option]] | ||
| + | |||
| + | Most mesh combining assets have an option to regenerate lightmap UVs. Without it, combined UVs will overlap each other. If you are using Mesh Combine, make sure "Regenerate Lightmap UVs" option is enabled in output settings. | ||
| + | |||
| + | <hr> | ||
| + | |||
| + | === I get a "Can't create vertex buffer" error === | ||
| + | |||
| + | This error can happen if the scene has more than ~40 million vertices. It is recommended to reduce geometric complexity of the scene, as tracing it would be too slow anyway. The typical cause of going over this limit is trying to bake with large arrays of trees painted on the terrain. In this case try disabling [[Manual#Export_terrain_trees|Export Terrain Trees]]. | ||
| + | |||
| + | <hr> | ||
| + | |||
| + | === Soft shadows appear like multiple hard shadows === | ||
| + | |||
| + | [[File:Unknown.png|thumb|Undersampled shadow]] | ||
| + | |||
| + | Increase ''Shadow Samples'' on the light or decrease the ''Shadow Spread''. | ||
| + | |||
| + | <hr> | ||
| + | |||
| + | === Lightmaps are black on GTX 650 === | ||
| + | |||
| + | Apparently newer Nvidia drivers deprecate some CUDA functions on older hardware. It is recommended to use driver version 442 on GTX 650, as it still supported everything Bakery uses. | ||
| + | |||
| + | <hr> | ||
| + | |||
| + | === Lightmaps disappear on play === | ||
| + | |||
| + | * Make sure that '''Project Settings''' -> '''Editor''' -> '''Enter Play Mode Settings''' -> '''Reload Scene''' is turned '''on'''. | ||
| + | * If that doesn't help, try applying the latest [[Github_access|patch]]. | ||
| + | |||
| + | <hr> | ||
| + | |||
| + | === I get a DllNotFoundException === | ||
| + | |||
| + | * Check if the DLL file mentioned in the error actually exists in your project. If it doesn't, your Bakery installation is incomplete or corrupted; please reinstall it. | ||
| + | * Check if you're running 64-bit Unity Editor under 64-bit Windows (7 or newer) (as listed in [[Manual#System_requirements|system requirements]]). | ||
| + | * Make sure you have 64-bit [https://www.microsoft.com/en-us/download/details.aspx?id=48145 Visual C++ Redistributables for Visual Studio 2015] installed. In case if the Microsoft site download is broken, here is a [https://drive.google.com/file/d/1WfRP1A43bCwZflZ_I0wHSGPyC3b-0lqK/view?usp=sharing reupload]. | ||
| + | |||
| + | <hr> | ||
| + | |||
| + | === Lightmap UVs are wrong when opening previously baked project on a Mac === | ||
| + | |||
| + | When Unity reimports model assets, it performs UV unwrapping. If you baked the scene with [[Manual#Unwrapper|Unwrapper]] was set to xatlas, it won't work on a Mac because Bakery's xatlas wrapper library is only compiled for Windows. Rebaking with Default unwrapper should fix it. | ||
| + | |||
| + | You can still keep xatlas as the [[Manual#Atlas_Packer|Atlas Packer]]. | ||
| + | |||
| + | ''Unwrapper'' is used to generate UVs for individual, isolated meshes, while ''Atlas Packer'' packs big scene-specific atlases out of many unwrapped layouts. | ||
| + | |||
| + | Combining Default unwrapper with xatlas being used as the Atlas Packer and enabling [[Manual#Hole_filling|Hole Filling]] should give pretty good [https://x.com/guycalledfrank/status/1231890428313600000 results] and compensate for any individual mesh unwrapping inefficiencies. | ||
| + | |||
| + | <hr> | ||
| + | |||
| + | === Error message "Failed to load OptiX library" === | ||
| + | |||
| + | Nvidia driver 590 (and newer) removed support for OptiX 6.0 which Bakery depended on. Bakery v1.98 added support for the new driver, now using OptiX 9.0. | ||
| + | * Make sure you're using a [[Manual#System_requirements|supported Nvidia GPU]]. | ||
| + | * Update Bakery to v1.98 via the [https://assetstore.unity.com/packages/tools/level-design/bakery-gpu-lightmapper-122218 Asset Store], [[Github_access|github or the built-in patcher]]. | ||
| + | * If you still get the error every time, click Bakery -> Utilities -> Detect Optimal Settings and choose "Set recommended as default". | ||
| + | * If you don't want to update Bakery, roll back your GPU driver to any pre-590 version (e.g. [https://www.nvidia.com/en-eu/geforce/drivers/results/257569/ 581.80]). | ||
Latest revision as of 13:00, 7 January 2026
This is a list of common problems, their symptoms and solutions.
Contents
- 1 Shadowmasks are not baked
- 2 Shadowmasks are baked, but Unity renders real-time shadows instead
- 3 I can't see specular lighting after the bake
- 4 Using a version control system I copied the scene to another PC and it doesn't look right
- 5 Baking same asset in one scene breaks its UVs in another scene
- 6 Denoiser throws error 505 or Unknown error
- 7 I get an “Out of memory” error
- 8 I get a “Can't map texture” error
- 9 I get a “Can't create texture” or "Can't create rasterizer state" error
- 10 After importing Bakery I get errors containing “obsolete” and “UnityUpgradable”
- 11 I get a "Can't load" error
- 12 I get a "Launch timeout" error
- 13 I have an Android project, and lightmaps don't look good
- 14 I have a scene baked with MonoSH, and lighting looks pixelated
- 15 There are weird square artifacts on my geometry
- 16 I get too many lightmaps
- 17 I get jagged shadows
- 18 "Exporting scene - preparing" is taking too long
- 19 Stuck at "Waiting for Unity to initialize the probes..."
- 20 Baked prefabs instantiated at runtime in a build have no lightmaps
- 21 Speedtrees look fine in the editor, but black in builds
- 22 Scene is black in build
- 23 HDRI produces scattered bright spots (fireflies)
- 24 Small emissive (or brightly lit) surfaces produce noise
- 25 "Adjusting UV padding" happens too often and takes too much time
- 26 Denoiser produces bright edges around geometry/shadows
- 27 Light probes are too bright in Subtractive mode
- 28 Baking produces "Not allowed to access uv2" errors
- 29 Whole scene is very bright or black
- 30 Bakery says "Device is not DX11"
- 31 Bakery doesn't work on my 3070/3080/3090 GPU?
- 32 Denoiser produces grid-like patterns
- 33 I get "rtcRes == RTC_SUCCESS" error
- 34 Baking any scene crashes with unknown error
- 35 Combined meshes (e.g. using Mesh Combine asset) bake incorrectly
- 36 I get a "Can't create vertex buffer" error
- 37 Soft shadows appear like multiple hard shadows
- 38 Lightmaps are black on GTX 650
- 39 Lightmaps disappear on play
- 40 I get a DllNotFoundException
- 41 Lightmap UVs are wrong when opening previously baked project on a Mac
- 42 Error message "Failed to load OptiX library"
Shadowmasks are not baked
Check following things:
- Bakery's Render Mode is set to Shadowmask.
- Masked lights have both Unity and Bakery light components on them.
- Masked Bakery light components have "Baked contribution" set to "Indirect and shadowmask".
Shadowmasks are baked, but Unity renders real-time shadows instead
You're in Distance Shadowmask mode, it's expected. Read more about the difference:
https://docs.unity3d.com/Manual/LightMode-Mixed-Shadowmask.html
https://docs.unity3d.com/Manual/LightMode-Mixed-DistanceShadowmask.html
- To switch between two modes, you can use "Distance Shadowmask" checkbox in Bakery main window.
- If you're on 5.6, go to Window->Lighting->Mixed Lighting->Lighting Mode to switch the mode.
I can't see specular lighting after the bake
Apparently specular lighting was provided by real-time lights before the bake. Now the lighting is baked into static textures and there is no specular. However, you can:
- Use Reflection Probes. Good option for highly glossy objects.
- Use mixed lights and only bake GI/Shadowmasks. Specular remains real-time.
- Bake in Dominant Direction or SH mode and use Bakery shaders with "Lightmapped specular" option. It will give some specular approximation. Looks good on surfaces with medium/high roughness.
Using a version control system I copied the scene to another PC and it doesn't look right
Make sure you followed version control guidelines.
Baking same asset in one scene breaks its UVs in another scene
The reason here is UV padding adjustment. It modifies the UVs in the asset, so spacing between UV charts is optimal, meaning they never leak over each other and there is no much wasted space. Unity has a manual Pack Margin option on model assets, but it’s limited since it applies the same exact value for all meshes inside the model, while each mesh can get drastically different size in the final lightmap based on its surface area. Therefore Bakery overrides it with automatically calculated per-mesh (instead of per-model) padding. However, because “optimal” varies depending on baking resolution, it can be problematic to reuse the same asset in isolated scenes with different lightmap size. There are multiple ways to solve it:
- a) Just disable UV padding adjustment (set to Don't Change). Results will be similar to built-in baking.
- b) Generate your own optimal UVs. UV padding adjustment only applies to models with auto-generated UV layout (aka “Generate Lightmap UVs” checkbox) and never touches custom data.
- c) Set Asset UV Processing to "Adjust UV padding only for new meshes" (currently available in the github version).
- d) Use UV padding: increase only checkbox and first bake the lowest resolution scene, and then the rest.
- e) Use two different models for different lightmap resolutions, so each will get the most efficient set of UVs.
- f) Bake both scenes together.
- g) Lock UVs using Save UV padding to asset
Denoiser throws error 505 or Unknown error
If you are using a Kepler GPU, try switching to legacy denoiser.
I get an “Out of memory” error
This means rendering needed more video memory from your GPU than it has available.
First, try closing any other graphics-intensive programs (browsers too).
If the problem persists, the most likely reason is that the resolution you selected is unreasonably high for the given scene. Resolution is defined by Texels per Unit (this section also has a list of reference values) or set explicitly in Lightmap Groups. Reducing it will help. You can always selectively use high resolution for important objects via Scale in Lightmap.
If you have terrains in your scene, make sure Terrain optimization is enabled.
If you have a very high amount of painted trees on your terrain, try disabling the Export terrain trees option.
I get a “Can't map texture” error
Typically happens if your system went out of RAM (system memory, not video memory) during the scene export process. Your scene could already be taking too much RAM by itself, not leaving enough free memory for Bakery export.
- Try closing any memory-intensive programs before baking.
- Try reducing Max Resolution from 4096 to 2048.
- If you are baking very highly detailed (millions of triangles) geometry, try excluding some of it from the bake.
- Try disabling Export terrain trees.
- Try enabling Terrain optimization.
This error can also be shown in case of GPU driver crash, in which case Unity editor also won't render anything.
If this error happens at the end of the render process (from the seamfixer app), try increasing the TDR.
I get a “Can't create texture” or "Can't create rasterizer state" error
Typically errors like this are caused by such chain of events:
- Some objects in the scene have incorrect lightmapping UVs. Often the UVs contain many large triangles overlapping each other.
- Scene uses large lightmaps.
- Bakery tries to rasterize a huge amount of 4k-sized overlapping triangles to prepare the UV GBuffer.
- This operation takes > 2 seconds, and the driver is reset by Windows due to TDR: https://docs.microsoft.com/en-us/windows-hardware/drivers/display/timeout-detection-and-recovery
- Consequent GPU operations are failed due to reset.
Solution:
- Make sure all your objects either have non-overlapping UV2 or enable "Generate lightmapping UVs" on all model assets.
After importing Bakery I get errors containing “obsolete” and “UnityUpgradable”
Before importing Bakery, make sure you don't have any compilation errors in your project.
Restart Unity, reimport the package. Click “I made a backup, go ahead” if Unity asks.
See this page for more details.
It is also known that some versions of Unity Hub have a bug preventing API updater from running.
I get a "Can't load" error
If Bakery says it can't load something, make sure you have enough free disk space on the drive used for temporary data.
Some parts of Bakery can't deal with non-ASCII characters (this is going to be fixed soon). Try naming your scenes and lightmap group assets with ASCII characters. Latin letters and numbers must always work.
I get a "Launch timeout" error
This error can happen if your GPU took more time than it is allowed by Windows TDR.
- Try disabling Terrain Optimization.
- Try lowering the value of Tile Size, especially if it's higher than 512, so baking job is split into smaller chunks.
- Depending on the pass being processed, try lowering the Samples value (e.g. GI samples, Skylight samples, etc).
- Reduce geometric complexity of the scene, if tile size/samples don't help.
- As a last resort, disable TDR registry keys. This will prevent Windows from resetting the driver, but your computer may appear unresponsive during the bake.
Additional instructions for changing the timeout (from Substance)
I have an Android project, and lightmaps don't look good
Sometimes, when working on Android projects, you may encounter banding artifacts, with gradients having discrete steps of different hue. This is caused by texture compression and HDR encoding Unity uses for this platform, which often turns out to be "Double LDR" (see details). The problem is not exclusive to Bakery and will as well happen with built-in lightmaps.
In Player Settings, set Lightmap Encoding to High Quality.
If your target devices support ASTC compression, make sure it is enabled in Build settings. PVRTC is also a good choice, although it is mostly supported on iOS devices. ETC compression gives poor results for lightmaps.
If above solutions are not enough, select lightmap assets and set texture compression quality to High or None (try both).
Note that setting it to None will use more video memory on the device.
I have a scene baked with MonoSH, and lighting looks pixelated
In some scenes, MonoSH lightmaps can look pixelated, if low (or "normal") quality compression is used (e.g. DXT1). Usually setting Compression = High on the L1 texture fixes the issue.
You can enable all L1 textures to always use High quality compression by toggling Project Settings -> Bakery -> High quality direction.
Note that depending on the platform, High quality compression can take more memory. On PC it usually doubles by going from DXT1 to BC7 format.
There are weird square artifacts on my geometry
Weird squares may sometimes be seen on models when their shape is too different from their normals. Bakery tries to compensate starting ray points to take fake normal smoothness into account, but in extreme cases the algorithm can't handle the discrepancy. Usually it's enough to just recalculate normals on the model. E.g. in Unity you can select the FBX and change "Normals" to "Calculate" instead of "Import". Alternatively, you can disable the related compensation algorithm, but it’s actually beneficial in most cases. You can toggle it in Project Settings → Bakery → Generate smooth positions.
I get too many lightmaps
Possible causes are:
- Atlas packer is set to Default or Post-packing is disabled. Set Atlas Packer to xatlas and enable Post-packing for best results.
- Texels Per Unit value is high or Max Resolution is low. Bakery packs objects from open scenes into multiple lightmap atlases and packs them as rectangles (in a fashion similar to this; unless Hole Filling is enabled) with their size dependent on (surface area * texels per unit). If some object can't fit into existing atlases, a new one is allocated. New atlases are always as large as the Max Resolution parameter, or smaller (but not smaller than Min Resolution), if the estimated surface area of remaining unpacked objects is below some threshold. You can also increase Min Resolution a bit, replacing a bunch of small (but dense) maps with a few large (but possibly with some empty space).
Additionally, increase Min Resolution to prefer larger combined lightmaps instead of many smaller ones.
If not using post-packing:
- If you bake multiple open scenes and Split by scene checkbox is on, different scenes will never share the same lightmap, therefore multiplying their count.
- If Terrain optimization is on, terrains will always use a separate lightmap.
Pre-atlasing your scene in your modelling package of choice and using the Original UV mode instead of relying on the auto-atlaser can significantly improve packing effectiveness.
Since v1.71 Bakery prints number of future used lightmaps to console when enabling/refreshing Checker Preview. You can experiment with resolution/density settings until the desired value is printed.
I get jagged shadows
Apparently you are baking very sharp shadows at low resolution. Try increasing shadow spread parameter on the light (direct or point) and optionally enable bicubic interpolation. On a Direct Light you can also enable the Anti-Alias option.
"Exporting scene - preparing" is taking too long
(Or "Exporting scene - atlasing")
- Try setting Atlas Packer to Default.
- Make sure you use reasonable Texels Per Unit value.
- Make sure your meshes are correctly unwrapped.
- Possibly disable UV Padding Adjustment.
If you're converting a large existing scene, make sure to follow this guide.
Stuck at "Waiting for Unity to initialize the probes..."
There isn't much Bakery can do about the logic of Unity lighting data asset generation (there is no API in the engine to control it at the moment). Try to focus editor window (especially scene view) to wake Unity up.
Baked prefabs instantiated at runtime in a build have no lightmaps
Because Unity technically has no support for prefabs having lightmaps, it can omit lightmapped shader versions from builds, not realizing they are needed. You can fix it by going to Shader stripping settings and enabling lightmap modes you use. Additionally, try disabling Optimize Mesh Data in Player Settings, as Unity may omit UV from the build.
Speedtrees look fine in the editor, but black in builds
Also related to shader stripping. See the prefab solution.
Scene is black in build
See advice above. Additionally, if the scene is loaded asynchronously, call ftLightmaps.RefreshFull() when it is fully loaded.
HDRI produces scattered bright spots (fireflies)
This artefact comes from the fact your HDRI has very bright, yet very small parts, typically sun. Rays will miss it often, producing occasional spots when they don't. This problem is well known in many offline ray tracers as well.
- Use Direct Light for the sun
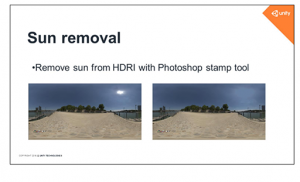
- Remove sun from HDRI (also recommended by Unity)
- Possibly downsample/blur the HDRI
Small emissive (or brightly lit) surfaces produce noise
The issue is similar to the one above and may happen when using very small and very bright emissive surfaces, or small non-emissive surfaces lit by a very intense light. In case of emissive surfaces, you can replace them with Light Meshes to prevent it. See Differences between Light Mesh and emissive materials. Alternatively, try increasing GI sample count.
"Adjusting UV padding" happens too often and takes too much time
UV padding adjustment is a feature that optimizes asset UVs based on the size they take in lightmaps. This process will happen for a model if:
- Option is globally enabled.
- Asset has "Generate Lightmap UVs" checkbox enabled. Models with custom UVs are not adjusted.
- Model was not adjusted before or...
- ... its lightmap size has changed.
Therefore it can be triggered for all auto-unwrapped models after their geometry or resolution changes. UV padding adjustment will try to waste less lightmap resolution and reduce texel leaking, but it is not necessary. If you are doing many experimental/draft bakes, you may consider disabling it (set to "Don't change"), then possibly enabling it back for the final quality bake.
Also note that using xatlas as Unwrapper can be notoriously slower comparing to Default.
Denoiser produces bright edges around geometry/shadows
Sometimes you may encounter bright edges or spots at high contrast edges caused by the denoising neural net, most notably OptiX 6 and 7.
- Use OptiX 5 or OpenImageDenoise if you can (denoiser option).
- Try enabling Denoise: Fix bright edges.
- Try setting texture compression to None on lightmap assets.
- Try setting Backface GI to 1, removing dark shadows inside objects. While these shadows are normally not visible, their edges may cause problems for both the denoiser and texture compression.
Light probes are too bright in Subtractive mode
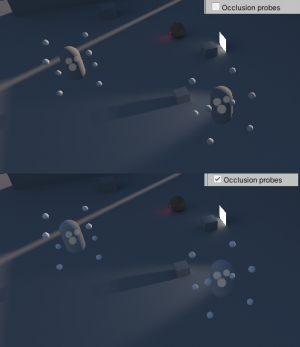
Light occlusion information is not baked into probes. Solution:
- Set your Unity directional light to Mixed mode.
- Enable Occlusion Probes.
- Bake
Some versions of Unity may need a scene reload to properly apply the Lighting Data Asset.
Baking produces "Not allowed to access uv2" errors
All lightmapped models must have Read/Write enabled on.
Whole scene is very bright or black
- Check if your light intensities are in a reasonable range (< 100; or <= 100000 Lux in HDRP).
- Check the same for indirect intensity on all lights. A multiplication of direct and intensity intensity must not go into thousands, otherwise GI algorithm may overflow.
- Check if you don't use assets with High mesh compression. When set to High, Unity mesh compression will completely destroy lightmap UVs, only leaving 8 bits for them. This may produce many lightmapping errors including this one.
- Check if you have any .hdr overrides in the Preset Manager that change the way lightmaps are imported.
Bakery says "Device is not DX11"
Currently Bakery needs Unity editor to be running in DX11 mode to directly exchange texture data, so make sure your editor's window header says "<DX11>". If it does not, change active graphics API to DX11:
- Go to Player Settings.
- If "Auto Graphics API for Windows" is unchecked, you will see a list of APIs.
- Make sure "Direct3D11" is on top or place it there.
Bakery doesn't work on my 3070/3080/3090 GPU?
1. Please enable RTX mode.
2. If denoiser also fails, please update from github and use OpenImageDenoise option (some instructions are here).
Updated denoiser (both new OptiX version and OpenImageDenoise) as well as automatic hardware detection will be soon released on the Asset Store.
Denoiser produces grid-like patterns
OptiX denoiser might produdce grid-like patterns when fed with very low-precision lightmaps. Low precision is usually caused by either extremely dark or extremely bright lighting. It is recommended to stay within reasonable intensity range (see a similar advice for HDRP above).
- Alternatively use OpenImageDenoise, as it does not produce this pattern.
- This issue also does not affect OptiX 5.1 denoiser ("Legacy denoiser") as its training dataset is in its own DLL, but affects the non-legacy version (OptiX 6.0) and only on driver versions newer than 442.50, as the training datasets are in the driver (explanation from NVIDIA).
I get "rtcRes == RTC_SUCCESS" error
You are using a 3xxx+ GPU with RTX mode disabled. Enable RTX mode.
Baking any scene crashes with unknown error
There were some reports that Avast antivirus can block Bakery from running, even though Bakery's executables don't trigger any antivirus (including Avast) when scanned via VirusTotal. Perhaps it just block any executables that were launched 'indirectly', i.e. from another application. In any case, if you have Avast, try adding your project folder to exception list.
Combined meshes (e.g. using Mesh Combine asset) bake incorrectly
Most mesh combining assets have an option to regenerate lightmap UVs. Without it, combined UVs will overlap each other. If you are using Mesh Combine, make sure "Regenerate Lightmap UVs" option is enabled in output settings.
I get a "Can't create vertex buffer" error
This error can happen if the scene has more than ~40 million vertices. It is recommended to reduce geometric complexity of the scene, as tracing it would be too slow anyway. The typical cause of going over this limit is trying to bake with large arrays of trees painted on the terrain. In this case try disabling Export Terrain Trees.
Soft shadows appear like multiple hard shadows
Increase Shadow Samples on the light or decrease the Shadow Spread.
Lightmaps are black on GTX 650
Apparently newer Nvidia drivers deprecate some CUDA functions on older hardware. It is recommended to use driver version 442 on GTX 650, as it still supported everything Bakery uses.
Lightmaps disappear on play
- Make sure that Project Settings -> Editor -> Enter Play Mode Settings -> Reload Scene is turned on.
- If that doesn't help, try applying the latest patch.
I get a DllNotFoundException
- Check if the DLL file mentioned in the error actually exists in your project. If it doesn't, your Bakery installation is incomplete or corrupted; please reinstall it.
- Check if you're running 64-bit Unity Editor under 64-bit Windows (7 or newer) (as listed in system requirements).
- Make sure you have 64-bit Visual C++ Redistributables for Visual Studio 2015 installed. In case if the Microsoft site download is broken, here is a reupload.
Lightmap UVs are wrong when opening previously baked project on a Mac
When Unity reimports model assets, it performs UV unwrapping. If you baked the scene with Unwrapper was set to xatlas, it won't work on a Mac because Bakery's xatlas wrapper library is only compiled for Windows. Rebaking with Default unwrapper should fix it.
You can still keep xatlas as the Atlas Packer.
Unwrapper is used to generate UVs for individual, isolated meshes, while Atlas Packer packs big scene-specific atlases out of many unwrapped layouts.
Combining Default unwrapper with xatlas being used as the Atlas Packer and enabling Hole Filling should give pretty good results and compensate for any individual mesh unwrapping inefficiencies.
Error message "Failed to load OptiX library"
Nvidia driver 590 (and newer) removed support for OptiX 6.0 which Bakery depended on. Bakery v1.98 added support for the new driver, now using OptiX 9.0.
- Make sure you're using a supported Nvidia GPU.
- Update Bakery to v1.98 via the Asset Store, github or the built-in patcher.
- If you still get the error every time, click Bakery -> Utilities -> Detect Optimal Settings and choose "Set recommended as default".
- If you don't want to update Bakery, roll back your GPU driver to any pre-590 version (e.g. 581.80).
